Build A Shed This Summer

Your home and your yard require a large number of tools and supplies to keep in normal working order. Tools, supplies, seeds, mowers, and blowers … the list is long. After a while they outgrow your basement or your garage and need to occupy their own special, dedicated space at your home.

You need a shed.

And while there are a wide range of prefabricated sheds available at local hardware and feed stores, you can build a shed this summer by following these steps.

Measure and make space for your new shed

First, examine your storage needs and map it out. How much floor space do you need? Think about your wall space, and remember that you lose room at the corners. You also need space around each tool so you can grab it or take it off the wall.

Once you have measured, look at your yard and make space for your future shed. Do you need to take down some shrubs? Cut into your existing garage? Remove the old shed? Either way, out with the old, and in with the new! This might be the excuse you needed to rent a dumpster!

Choose a style and download a plan

Sheds come in a variety of styles. Are you looking for a lean-to, the most common and simplest structure? Perhaps you prefer a carefully crafted look, and want to build a model barn?

Or will you get really adventurous and make a mini-model of your home?

Whichever it is, there is definitely a plan for it online. These online plans are often downloadable and printable. Some are free, and others come with more detailed print plans for a small cost.

Buy the materials and build or assemble your shed

Following the plan you’ve purchased and downloaded, head to the local lumber company. Use the supplies list as a buying guide, and make sure you come home with everything you need.

And the hardest part requires the fewest words: build it.

Though it may take an afternoon or two, your new shed will free up space in your garage or basement, make it easier to do yardwork, and be an attractive conversation piece for years to come.

Photo by Pixabay

You need these IKEA organizers

When you are spring cleaning, it is tempting to make two common mistakes. The first is to throw everything out. The second is to keep everything.

Whichever of those two mistakes you tend make, this article is perfect for you. A quick trip to IKEA or another organizer store can get you a few handy tools that help your clutter feel less cluttered, so it doesn’t all have to be thrown away, but it also doesn’t make a mess in your home as you clean and reorganize this spring.

Hanging closet dividers

The inexpensive STUK dividers or SKUBB closet organizer make attractive and handy storage for whatever you have too much of. Store t-shirts, shoes, books, or other items vertically. Now instead of sorting through piles, you can quickly locate whatever you were looking for.

Simpler and less expensive than individual shelves, these hanging cloth organizers offer you flexibility and convenience. Better yet, they can simply affix to existing hangar poles in any closet in your home.

Cabinet of drawers

Small drawers are not just for the office anymore. There are dozens of applications for a small chest of drawers, and every homeowner or hobbyist can quickly organize a room and tame a troublesome corner of the house.

The Helmer drawers are on casters, meaning they can be easily moved around for multiple uses. The similar Alex drawers have less hardware and offer a clean, modern look.

With tall, short, and stackable options, there are lots of stylish options for your next room upgrade.

Open shelves

Available in a wide range of heights, widths, and shelf sizes, open shelves are a can’t-miss addition to your room upgrade. Whether you’ve seen them featured in Zoom rooms in business meetings during the pandemic, or in comfortable home decor open shelves are unattractive and useful addition in every room of the house.

In the bedroom, open shelves can hold books sweaters trophies or other items that are comfortable on full display. In the living room, well-chosen accent pieces on open shelves can  create a striking visual showpiece that is the envy of your neighbors. In the TV room the shelves can hold video game components, speakers, memorabilia, and more.

Different styles come in various sizes and can be paired for wider uses, but generally are not stackable. This popular Flysta shelf stands just over 4’ tall and is attractive as a standalone piece.

Photo by Dan Azzopardi on Unsplash

Spring Cleaning Tips to Keep Your Family Safe and Healthy

When spring arrives, we all face an irresistible urge to throw the windows open, turn the music up, and clean out our homes.

This spring, you can do a deeper clean than normal to make sure that you start the season with a safe, healthy, and virus-free home. Follow these tips to get unusual and hard-to-clean locations spotless this spring.

Deep clean behind the refrigerator

One often-neglected spot in every house is behind the refrigerator. The combination of being hard to reach is combined with natural convection that comes from coils heating and cooling, and in many cases fans that circulate air around the appliance.

This means lots of dust. Add that to the grease naturally found where you do your cooking, and you’ve got a sticky dirty mess.

Use a mix of water and an abundant supply of grease cutting cleaner – including dish soap – to get this spot looking like the day you moved in.

Fight mold in your dehumidifier

As the days heat up, homeowners pull the dehumidifier out of storage to help their basements stay cool and to delay air conditioner season. But what happened inside the dehumidifier during the long off-season? Was it put away completely dry, or did mold possibly grow in the coils?

One way to fight mold is to create a solution of equal parts vinegar and water. Spray or wipe that onto the surface of your coils and every place that water goes during regular operation of the dehumidifier. Then wait several hours for it to dry. Now you can start your season off confident that you aren’t spreading mold spores throughout your house.

You can also use an ultraviolet light to fight mold in your dehumidifier.

Wipe down your door knobs

We were all relieved when we learned that COVID did not spread easily on surfaces but was instead spread in the air between people. However, we ended an important practice that was helping keep us safe from lots of germs: wiping door handles.

Every day we touch the handles of our doors – some more than others – at various times. Sometimes our hands are clean. And sometimes they are not.

It’s impossible to know exactly what viruses, germs, or other contaminants get on our door knobs during this time.

The best solution is to periodically wipe them down with warm soapy water or a mild bleach solution.

Spring is a great time to clean parts of your house you have neglected all winter long.

Photo by Arno Smit on Unsplash

Build a Patio This Summer

Summer is coming. And when it arrives, you will be looking for reasons to spend time outdoors. And you will need more space to support your many outdoor activities: cooking, hosting guests and friends, or just reading. The perfect place for all of this activity is your new patio.

Depending on a variety of factors, a wood or a poured concrete patio might be the right choice for you.

Should I choose a concrete patio?

If you need a ground level patio on level ground outside your home, a concrete patio might be the right solution.

Durable, easy to clean, and available in a variety of custom finishes, for many homeowners this is the ideal choice. Custom pours and finishes can make modern concrete look like brick or stone, and even match existing walks and the drive. Custom dyes make concrete a fashionable option.

One downside is that concrete pours tend to be expensive. Additionally, these take more space to build, as access for the truck to pour concrete, or several workers to carry it by the wheelbarrow, makes it a choice for large and flatter spaces.

Should I choose a wood deck?

Pressure treated lumber has long been a favorite building material for porches and decks. Its affordability and flexibility allow for a variety of uses including ground level, upper level, or even multi-level patio / porch visions.

Contractors and avid do-it-yourselfers find wood to be the ideal solution. Since most homeowners already have the necessary tools for woodworking, and lumber is available at a big box store within driving distance of most locations, many homes today have wooden decks.

Some downsides of lumber is that it typically is limited to a variety of wood colors. Additionally, finished wood decks ten to look less formal and are not ideal for every decor or home style.

How do I start?

Make sure you have the space and structure for the patio or deck you desire. In some cases this means taking out an existing deck or patio. Destruction on this level often means renting a dumpster to take away yard debris or the torn down remnants of the original structure that was in that location.

You can work with the friendly staff at Big Daddy Dumpster to arrange a dumpster of the perfect size to match your project and arrange drop-off and pick-up times that match your project calendar.

Photo by Cameron Smith on Unsplash


COVID Spring Cleaning Tips

How is it March already? Winter is coming to a close, and we all need a fresh start to the new season. Spring is a time for renewal, longer days, and uplifted moods. There’s no better way to prepare for Spring’s arrival than to do a thorough Spring cleaning.

Spring cleaning might look a bit different this year after yet another winter trapped inside due to COVID. But warmer weather is approaching, and the time to reinvigorate your life is coming. Take the time this spring to really get into every room and get it clean from winter’s gloom.

Here are some helpful tips to get you through to the next season:

Go through your refrigerator and freezer! COVID might’ve had you stocked up on every type of frozen meal in case of another lockdown, but make sure you sort through what food has passed its expiration date. This will leave you more room to stock up on fresh, in season foods. After you’ve sorted your food, wipe down your refrigerator and freezer. A lot more grime can be hiding in the drawers, door, and shelves than you think.

Dust! Dust! Dust! After the long winter, dust particles have had more than enough time to settle onto various surfaces, cushions, walls, curtains, and more. Being able to open your windows this spring will only lead to more dust and pollen finding their way into your home, so get ahead of it and start with a clean slate.

Mop your floors and throw away any worn doormats! Snow boots and winter shoes may have tracked dirt, mud, residue from sidewalk salt, and more across your floors, and spring cleaning is the time to scrub that out of your home. Take your mops and sponges for a final cleaning then discard them and invest in new supplies for the spring.

Sort through your clothes! Clothes are something often overlooked during spring cleaning, but finally deciding to give away that pile of old sweaters you haven’t worn all winter might help you feel that sense of spring renewal. Save some space in your closet and spend some quality time in your closet this year. When you’ve decided what to keep and what to give away, find a local thrift shop or resale store to donate them to!

There are plenty more ways to attack your spring cleaning list, but those are some good starting points after a winter trapped inside.

Photo by Kelly Sikkema on Unsplash

Backyard Landscaping Ideas

Spring time is almost here, and the warmer weather might be pushing you to attend to your yard for the first time since the first frost. This might seem like a daunting project, but there are several easy and fast ideas that will transform your outdoor space.

The first thing that might help bring your yard back together is a fresh layer of mulch on any showing dirt or garden space. The topsoil or leftover mulch from the previous spring might have lost its color, evenness, and spread, making now the perfect time to put some more down. Taking the time to rake out a couple bags of fresh mulch throughout your garden will not only add vibrancy, but also protect the soil from coming rain.

Before putting down mulch, consider going to your local flower and plant shop to purchase a couple of both ground plants and pots. These in combination with the mulch will put the color back in places that used to be covered with snow and ice.

Adding vertical components to your yard such as trelicases will also add visual depth to your backyard. These will allow vines to grow upwards instead of out, controlling where your plants are growing and adding to the aesthetic at the same time. If you have a garden, you can use vertical features to make space for things like beans and cucumbers to grow as well.

If you have the space, digging a hole for a small pond may also be the cheap and easy landscaping project you are looking for. Nestling a plastic basin – bought from your local or chain hardware store – into a corner or along a fence will also begin to attract more neighborhood wildlife! You will soon notice birds, squirrels, and maybe even frogs and turtles gathering in your yard.

If you are looking for a way to repurpose things from your garage, painting rocks or old gardening tools (watering can, flow pot, etc.) and placing them tastefully around your yard can add a creative aspect to your outdoor space.

Though these are just the start of ways you can quickly and cheaply transform your yard after the long winter, the list of possibilities is endless. Regardless of what you choose, take the time to throw away or refurbish your old or worn items and refresh the view from your window!


Get an Estimate for Your House Painting Project

You’ve seen the signs that your house will need to be painted this summer or fall. Perhaps it is peeling paint falling in your driveway or the bushes against the side of the house. Perhaps there is an unsightly mildewy look beneath the eaves. Maybe the evening light reveals that the parts of your house exposed to full sun look just a little different than the ones that are shaded much of the day.

It’s time to get a reliable estimate for getting your house painted.

Gather information

Your first step is to start gathering information. Who do you know that paints houses, or recently had their house painted. Who do they recommend? Did they have a positive experience? How does the paint job look now?

Later, when you get a few estimates, you can also check the Better Business Bureau site for references and information about the companies who have actually submitted competitive bids. Remember though, just because a company has had a complaint or two at the BBB does not mean that they are not a good candidate for your work. Look instead to see if the complaint was reasonable, and whether the company was able to successfully resolve it. The biggest and best companies are not the ones that never make mistakes. Instead, they likely make a few mistakes just because of the amount of work they do. The real proof is whether they solve those occasional issues to the satisfaction of the customer.

Define the job

While you are gathering information about who you might want to have paint your house, begin to think about the scope of the work.

Does the paint job include a nearby garage or shed? Are there a few hard-to-reach eaves or other spots? How many layers of paint are already in place – will it have to be a full scrape job or just a light scrape then they can paint over it? How much of the work will be done on ladders or scaffolding? How important is it that they pick up all their debris – or are you willing to do some of the clean-up to save a few dollars?

Request and evaluate bids

Once you’ve clarified the work and gathered a few names, you are ready to make calls.

List a few key points about the work, and call to ask for estimates making sure you mention those points. Most companies will give you an estimate for free, but they will tell you upfront if they do or don’t offer everything you request.

Then use the information you have gathered and pick the company that meets your needs and your budget. Remember that getting better quality work the first time – including better quality paint – means a few extra years before your next paint job.

Photo by Ricky Singh on Unsplash

What is That Spill in My Garage?

When it gets to be time to clean out your garage, and you have worked all day to get it cleaned out, you are likely to see something you haven’t seen in a long time: your garage floor.

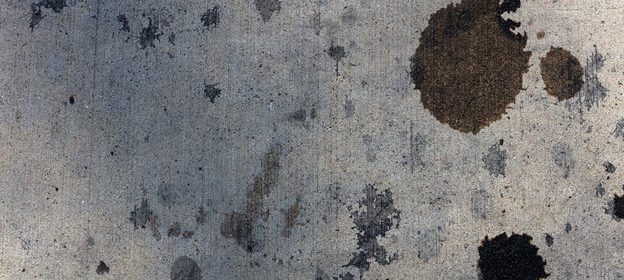
And there you are likely to find a wide variety of spills and stains.

Here is a handy guide to the kinds of stains you might find, and how you should go about cleaning them up.

Gasoline

A common spill in the garage is gasoline. This kind of spill happens most often if you use a gas powered mower or trimmer.  These often require that you mix gas and oil in a separate container and then fill the mower or trimmer through a spout. Those spouts are prone to leak.

You will likely recognize the smell of gasoline stain. Sop up any excess fluid with a cloth or rag, then dispose of that in the trash after allowing the cloth to sit in a breeze to allow gasoline to evaporate. This will keep it from becoming a fire threat in your trash can. The remaining stain can be treated with kitty litter or sawdust which will help draw the remaining liquid out.

Oil

Another common garage spill is oil. This can happen the same way the gasoline spills happen, because many two-stroke engines require a mix of gasoline and oil, so these spills often happen together. Additionally, it can happen if you change your oil in your garage. It is not unusual for a little oil to get on the floor from a drip, or perhaps even a spill if you accidentally knock something over.

As with gas, you should sop up excess or standing fluid with a cloth, kitty litter, or sawdust. After allowing it to air out until the odor diminishes, you can then sweep it up into a trash bag and throw it away.

Windshield wiper fluid

A third, most common spill in a garage is windshield wiper fluid. This is frequently colorless, but might have a sweet odor, if you’re adventurous enough to have a sniff.

Cleanup is very straightforward, just sop up the excess with a rag or towel. Luckily this poses no threat in your trash.

If you are routinely finding these stains under your car, and you note that the spill returns after you have cleaned it up, the problem isn’t your garage, it’s your car. Take it to your mechanic to make sure that the leak can be fixed and it quits messing up the garage you worked so hard to clean!

Driveway stains. Photo by Jon Moore on Unsplash


I Found an Old Chemical Barrel Cleaning Out My New Property, What Do I Do?

You are excited to get out into that  old structure on the back of your new property. There’s lots of junk in there: metal that would have to be scrapped, parts of things that crumbled or broke as you moved them. But you weren’t expecting this.

There under a tarp are a couple of barrels of some sort of liquid. Perhaps you can read the label or perhaps they are covered over with grime and dust from years of neglect. For some reason the previous owner could not dispose of what’s ever inside these barrels, or else they believed it would one day come in handy and kept it safe.

But now it is yours.  and you don’t know what it is.

What should you do?

esist your urge to see

First you have to resist your curious urge to check what is inside. It is natural to want to pry open the lid and have a look at this new mysterious liquid you own. You might be thinking to yourself, “How bad could it be?”

In actuality it could be really bad. After all there is a reason the previous owner did not dispose of it. It is possibly extremely hazardous material. Opening it could pose a hazard to you and others working in that area, and could even make the space uninhabitable.

Worse yet, some sealed materials deteriorate over time, and when you open the barrel, exposing them to oxygen could give them fuel they need to burst into flame.

Call the fire department

If the label on the side of the barrel is clearly labeled and  you can read the numbers,  you should call your local fire department and speak with a firefighter. This firefighter can tell you what exactly is contained in the barrel and what you need to do to safely dispose of it.

If the label on the side of the barrel can’t be read,  firefighters will respond to your location. They will bring the apparatus they need to investigate what’s in that barrel in a way that keeps everyone safe by preventing a fire or sickness from inhaling noxious or dangerous fumes.

It is easy to forget that firefighters strive to prevent problems rather than merely responding to them.  one phone call allows them to do their job and helps to keep you and your property safe.

Let firefighters tell you what is in the barrel. Picture by HafisFox via Pixabay.


Control Odors in Your Refrigerator

It happens to all of us. No matter how careful we think we are or we try to be. No matter how much or how little we have in our refrigerator. Whether it is a side-by-side, a walk-in, or a convenient dorm-size fridge tucked under a table, the day will come.

You open the door and … eww gross! It stinks!

Refrigerator odors can occur multiple ways. The best approach is to not let them get started. The next solution, once they have arrived, is to treat them quickly and correctly so they do not return.

How are common refrigerator smells created?

Most often the smell from your refrigerator is the smell of rotting food. No matter what it is that has lingered too long in your fridge, the smell generally tends to be the same. A putrid, almost warm smell that immediately stirs up the bile in your stomach and makes you want to recoil, cover your noise, or possibly even throw up.

It could be forgotten celery, or last week’s sandwich, or a pickle jar from … does that say 2003? Any of these items and more can be causing that odor. It could even be coming from a spill that you can’t see – one that has seeped behind a drawer or is … gross! – under something else!

The best first step is prevention.

Prevention

Move items around. By regularly moving your items around in your refrigerator you can prevent this from happening most of the time. Having the same old thing in a new location might prompt you to use it in a new recipe – or at least to remember that you bought it at Thanksgiving seven years ago.

Set a calendar reminder. By setting a specific day each month that you clean out the fridge, you can make a scary task simple because you will be keeping on top of the problem rather than letting it get worse.

Correction

Of course, when the smell happens, you have to deal with it. The only solution at that point is to clean the affected area with a cloth and warm soapy water. Don’t worry about using too much water, your refrigerator is waterproof.  Make sure you get the entire spill up. Be sure to check underneath the affected shelf. Sometimes the water from a spoiled meal can leak around the edge and cling to the top of the shelf below without ever dropping.

Finally, open a box of baking soda and place it in the back of your fridge. This will help control regular odors. Then when your appointed cleaning day comes, switch it out with a new box.

What is causing that smell in my fridge?


Photo by Abdullah Ahmad on Unsplash


1 4 5 6 7 8 13